I've been loving making these tote bags from placemats lately:


Materials: 1 placemat, 1 yard cotton or nylon webbing (from Fabric stores, used for belts or straps), 1 inch sew-on velcro, disappearing ink or pencil, measuring tool
I got my placemat from Target- I am loving their spring colors: turquoise, dark blue, orange, yellow and white! Other great places for placemats are Home Goods, Walmart, Kohls, Crate & Barrel.
Step 1: Fold placemat in half with wrong sides together- I guess you would call it hamburger-wise :) Then sew up both sides, with the presser foot along the seam. I start at the fold and sew up to the top edge, because the fabric is so thick, your sewing machine will thank you for this.
Step 2: Place your hand inside the placemat, and push out the corner so the seam is in the center, creating a triangle. Draw a line 1 inch down from the point and about 2 inches across. Then sew a straight stitch on the drawn line.
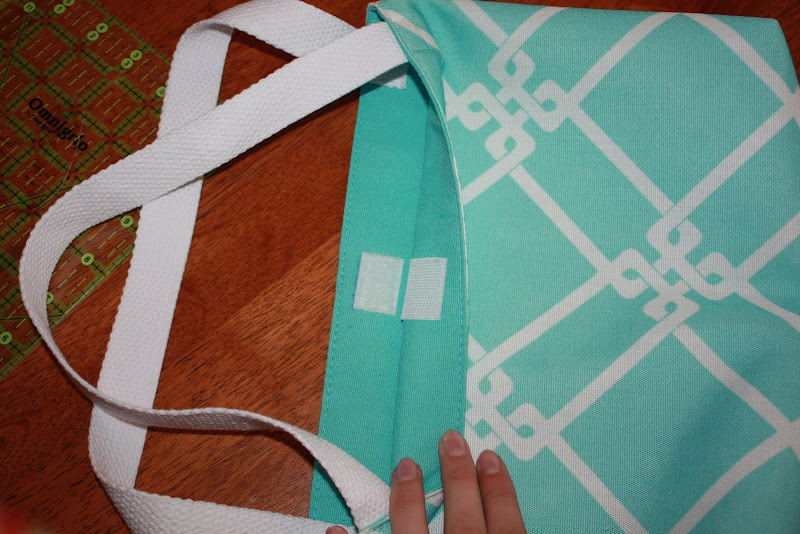
Step 3: Measure 2 1/2 inches from each edge. (The picture shows 2 inches, but I think 2 1/2 gives you a better strap length) Mark this spot with disappearing ink or a pencil on all four edges. Take your webbing and cut it in half so you have two 18 inch pieces.
Step 4: Sew the ends onto the placemat where you marked your spots- you can sew a square inside the webbing, and even an "X" inside the square if you want to have extra reinforcement. Do this to all 4 ends of the straps.
Step 5: Find center of the placemat and measure about 1/4 inch down and 1 inch across for the velcro pieces. Sew them on each piece of the placemat. You don't have to do the velcro, but I've found the bag gapes open if you don't. This way it closes nicely and will keep all your goodies safe inside!
Optional: Add a fabric flower for extra embellishment. See this post on fabulous fabric flowersfor some great tutorials!
Here are some more fabulous placemat tote bags I've made lately:


1 comment:
Love this! Wish I had come across them sooner. Will have to try this out next year.
Post a Comment